
How to Manage Your Affiliate Links
(And Why You Need It)
Whether you’re just starting out in affiliate marketing or have been in the game for a while, you’ve probably realized how challenging it can be to manage all your affiliate links — perhaps even harder than you initially thought.
There are several challenges when it comes to organizing and managing your affiliate links, and depending on how long you’ve been in the business, things might get even more complicated over time.
You might have one or more spreadsheets with all your links organized by affiliate. While this helps you stay organized, there are some problems you’ve probably encountered over time, such as:
- Affiliate links that break over time, leading to 404 pages.
- Products that your affiliates no longer sell.
- URLs that change over time.
- Updating affiliate URLs is very time-consuming — especially if you have multiple posts, blogs, or domains.
How to Organize Your Affiliate Links – The Traditional Way
Now that we’ve outlined some of the most common problems you might encounter when managing affiliate links, you probably don’t need a reminder of how tedious it can be to keep everything in order. So, let’s get to work.
If you’re not already doing something to organize your links, you should start now. Otherwise, remembering all your links will become a major headache as your business grows.
The traditional method for managing affiliate links is using a well-organized spreadsheet where you can keep all your links in one place and group them by affiliate.
This method works because it allows you to quickly access your links. Depending on how you design your spreadsheet, the process can be more or less efficient. Below, we share some articles and videos you can use for inspiration:
How to Organize Your Affiliate Links with AffiliateGeniusPro
In the previous sections, we discussed traditional ways to manage your affiliate links. However, as we’ve seen, they don’t solve one of the biggest problems — arguably the most important and time-consuming one. That problem is having to update or remove affiliate links across all your websites and articles.
This is where AffiliateGeniusPro shines. In fact, you might not realize it, but I’m using AffiliateGeniusPro to manage all the links in the site and even in this very article. Let’s see how it works:
1- Create an Account
The first step is to create a free account on AffiliateGeniusPro by clicking the following link: Create Your Free Account

Once you’ve created your account, you’ll receive an email to activate it (check your Spam/Junk folder). After activating your account, you’ll be able to log in and start managing your links easily.
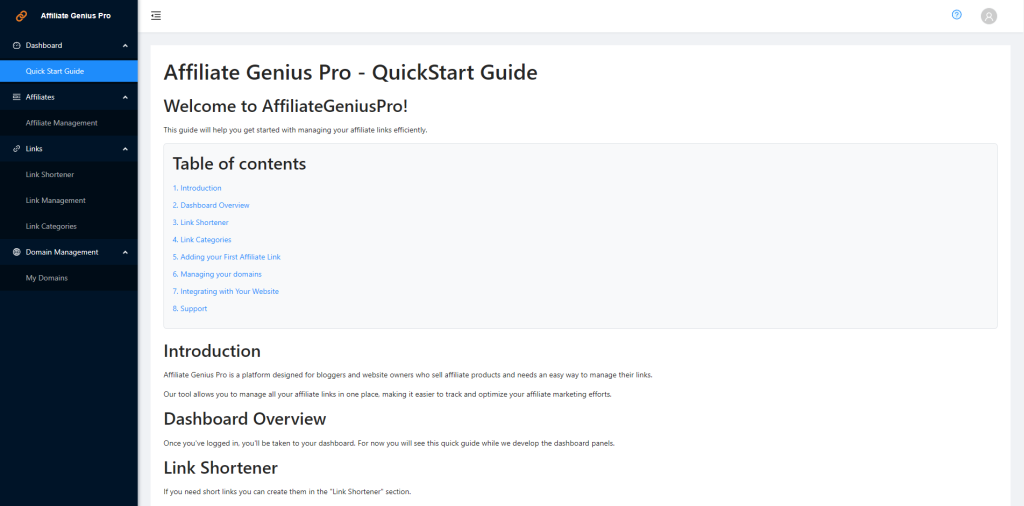
When you log in, you’ll find a quick start guide with more information about the platform.
2- Authorize Domains
The first thing you’ll need to do is add the domain where you want AffiliateGeniusPro to manage your links. To do this, click on “Authorized Domains” under “Domain Management” in the left-hand menu.
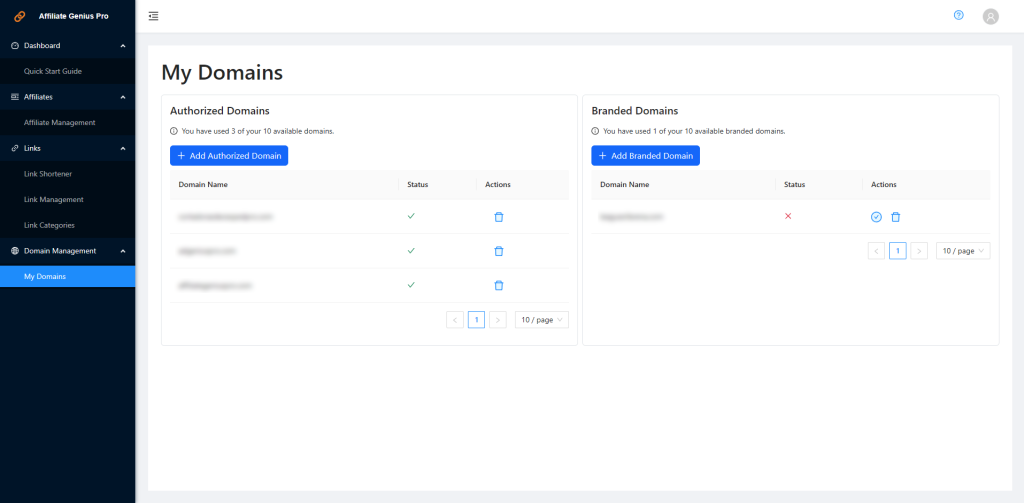
Here, you’ll see a table listing your authorized and your branded domains. Depending on your plan, there will be a limit on the number of domains you can authorize.
To add a new domain, click the “Add New Domain” button and fill in the form.
3- Add Affiliate Links
Once you’ve authorized your domain(s), the next step is to add your affiliate links to AffiliateGeniusPro. Click on “Link Management” under the “Links” section in the left-hand menu to open the link management screen.
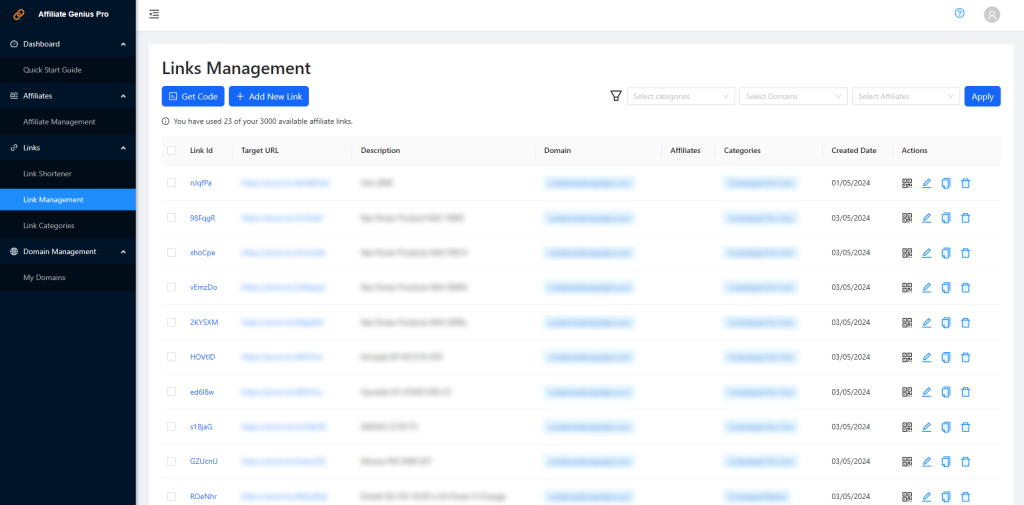
Then, click the “Add New Link” button and fill in the form with your affiliate link details.
Once you’ve added a new link, you’ll see a field called Link ID on the left. This is the identifier our system assigns to your affiliate link. You’ll need this ID for your website so AffiliateGeniusPro can replace the destination URL of your link with the one you set in our system.
4- Insert the AffiliateGeniusPro Code on Your Website
After adding all your affiliate links, you’ll need to insert a small code on your website. This code will manage all your links across your websites.
To do this, go to the “Link Management” screen (where you added your affiliate links earlier) and click the “Get Code” button.
A window will open with a code you’ll need to copy. Click the “Copy Code” button, and a confirmation message will appear.
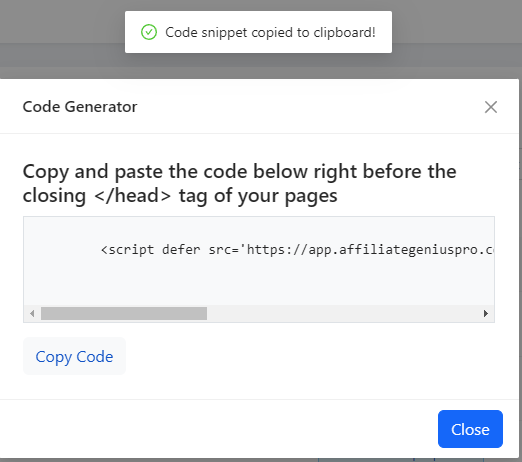
Paste this code before the closing </head> tag of your website. If you need help, feel free to send a ticket to our support team, and we’ll gladly assist you: Help Center
5- Modify or Add Links to Your Website
Now, go to the article where you want to place your affiliate link and follow these instructions:
WordPress or Any Other CMS:
If you use WordPress, you can add your links to buttons or links. (Note: image links are not supported at the moment.)
To make any existing or new link/button work with AffiliateGeniusPro:
- Save Changes: Save the changes on your website and view the page. If everything is working correctly, your link or button will point to the URL specified in our system for that Link ID. Any changes made to the destination URL in our system will automatically update your links.
- Add CSS Class: Add the
afgpclass to the link or button. This class works with any other classes you’ve added to the element. - Replace Target URL: Replace the target URL of your link or button with the Link ID from the Affiliate Link Management section.
Custom HTML Code:
If you’re not using WordPress or another CMS, you can still use our tool. Simply add the link code manually.
It should look like this: <a href='link_id' class='afgp'>This is your link</a>. Where link_id corresponds to any Link id in the Affiliate Link Management Section.
For the example shown in the word press, the code will look like this: <a href='5OQZnC' class='afgp whatever any other classes'>This is your link</a>
Final Steps
Once you’ve completed all the steps (it may seem like a lot, but it’s actually very simple), you’ll see that your article links are managed by AffiliateGeniusPro. Now you can change the destination URLs for your links in one place, and the changes will update across all your articles and websites.
Go ahead and give our service a try!